How to Generate a CSR Using OpenSSL (SSL & Code Signing Certificates)
This five-step guide provides a quick overview of how to use OpenSSL to generate a CSR for your digital certificates to secure your website or code
OpenSSL allows you to generate a certificate signing request (CSR) for SSL/TLS certificates and code signing certificates. Of course, this means you’ll have to have purchased a code signing certificate from a certificate authority or authorized reseller (like CodeSigningStore.com).
Whether you’re unfamiliar with the CSR generation process, or if you’ve forgotten the syntax of the specific OpenSSL commands, no worries — we’ve got you covered either way. Here’s what to know about using OpenSSL to generate a CSR both for SSL/TLS certificates and for code signing certificates.
How to Generate a CSR in Open SSL (for SSL & Code Signing Certificates)
The first thing you’ll need to do is ensure that you have OpenSSL installed on your device. If you don’t, go to Step 1A; if you do, jump straight to Step 1B.
Note: The steps between these two processes are largely the same — the difference comes when you’re asked to enter specific information for your SSL/TLS certificate that you won’t be asked for your code signing certificate.
Step 1A: Download, Install & Set Up OpenSSL Onto Your Windows Computer
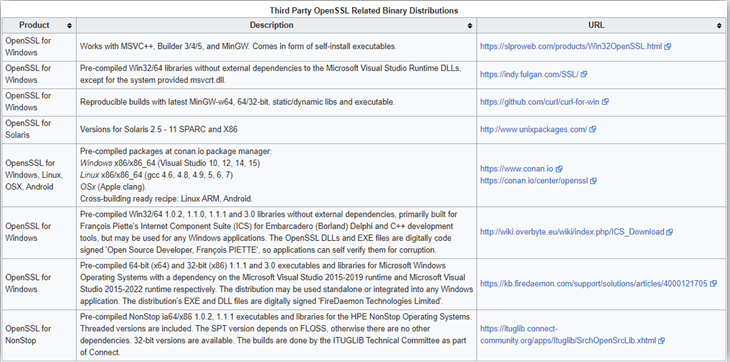
You can download OpenSSL from openssl.org. Select the version that works best for your system and needs and download and install it on your device.
Step 1B: Open Windows Command Prompt to Use OpenSSL
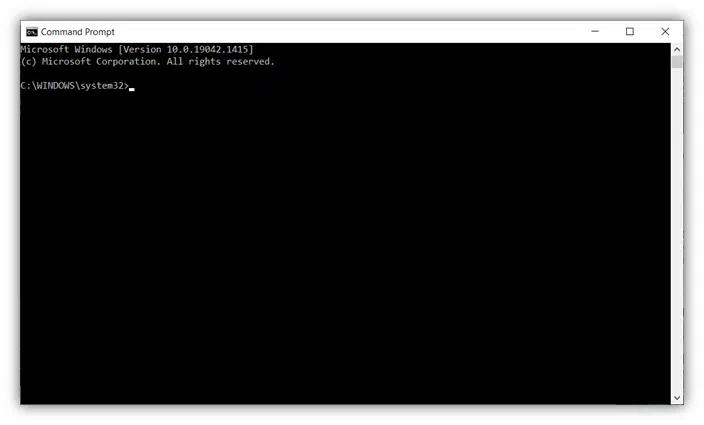
To do this, type CMD into your Run app and select Run as Administrator. This will open the Windows Command Prompt interface. For Windows 10 users, you can simply type the same command into the search bar that’s built into your taskbar.
Step Two: Change Your Directory to OpenSSL
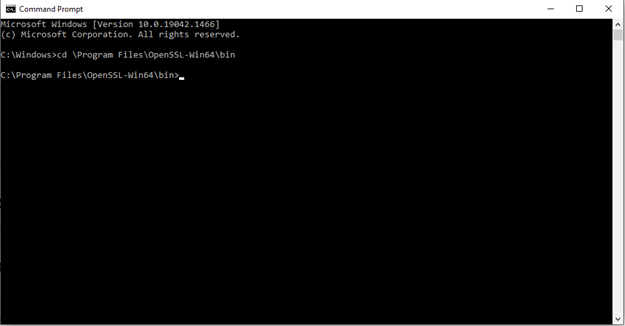
You can change the directory to wherever you have OpenSSL installed on your device. You can do this by using a command that looks along the lines of one of the following examples and then pressing the Enter button:
cd \OpenSSL-Win32\bincd \Program Files\OpenSSL-Win64\bin
Step Three: Use OpenSSL to Generate CSR and Key Pair
Now comes the fun part: generating your CSR and its corresponding public-private key pair in OpenSSL. This part of the process varies depending on whether you want to generate a CSR for an SSL/TLS certificate or a code signing certificate. We’ll break down each process individually in the corresponding sections below.
How to Generate an SSL Certificate CSR & Private Key
This section will break down individual commands as well as illustrate how to use a single command to generate both types of files.
SSL/TLS Certificate Key Generation in OpenSSL
Specify the certificate encryption algorithm (RSA, ECDSA, etc.) and the size of the private key. The command to initiate this will look akin to the following:
OpenSSL genrsa -out yourprivatekeyname.key 2048
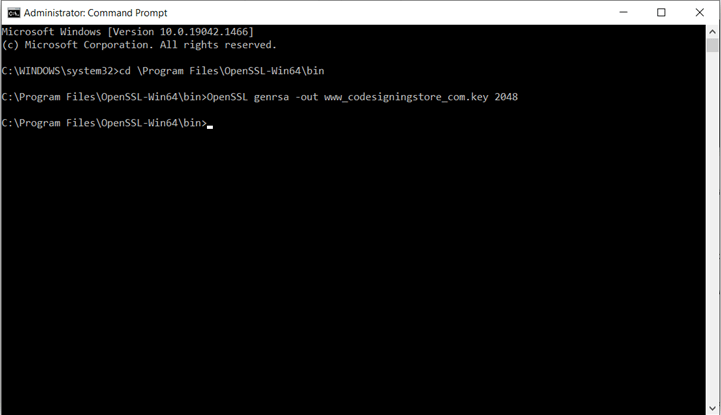
Here’s a more specific example using our domain:
OpenSSL genrsa -out www_codesigningstore_com.key 2048
SSL/TLS Certificate CSR Generation in OpenSSL
After you create the key, you’ll want to create the CSR file itself. You can do this by using the following command:
OpenSSL req -new -key domain_com.key -out domain_com_csr.txt
Again, here’s a more specific example using our organizational information:
OpenSSL req -new -key www_codesigningstore_com.key -out www_codesigningstore_com_csr.txt

Single Command for SSL/TLS CSR & Key Generation in OpenSSL
Note: Step four, which is where you’d typically input certificate details as prompted, is listed below. If you want to complete steps three and four together in one command, you could include all of the required information fields (which we’ll cover in the next section) using a command like the following:
Openssl req -new -newkey rsa:2048 -nodes -out www_codesigningstore_com_csr.txt -keyout www_codesigningstore_com.key -subj “/C=US/ST=Florida/L=St.Petersburg/O=Rapid Web Services, LLC/CN=www.codesigningstore.com”
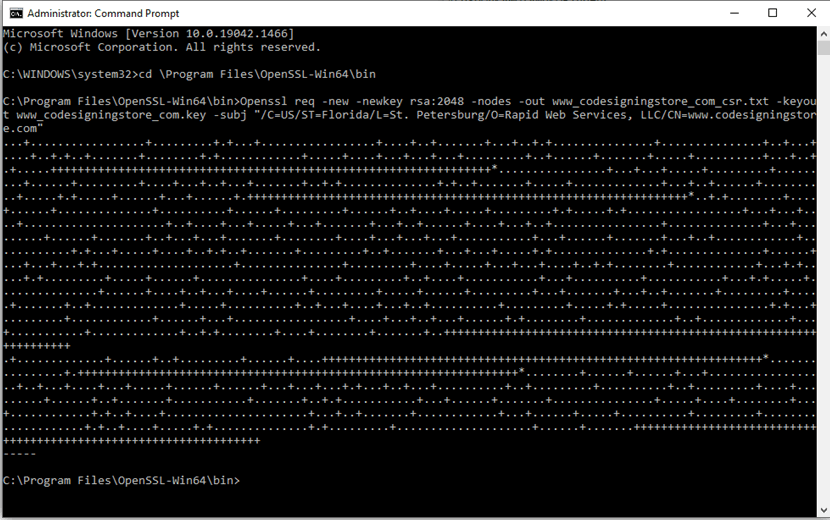
This generates your certificates in the \bin folder:
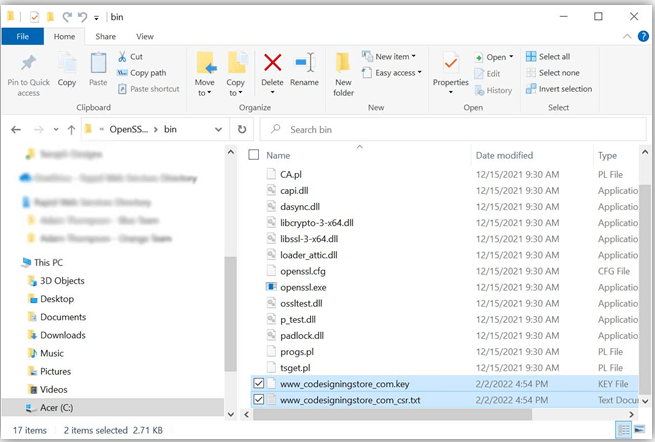
How to Generate a Code Signing Certificate Private Key & CSR
You’re basically just going to do the largely the same thing here — with a few key differences:
- Name your files differently. Only instead of naming the code signing key and CSR files something related to your domain (as you would with SSL/TLS certificates), you’ll likely want to name the files like “code_signing_key.key” and “code_signing_csr.txt” (or something similar). This way, you don’t confuse which key or CSR file belongs to which certificate.
- Use a different common name (CN). This will either be your personal name (if you’re an independent developer or publisher) or the name of your organization.
- Use a different key size As of June 2021, the CA/B Forum’s updated Code Signing Certificate Baseline Requirements specify that the minimum key size for a code signing certificate is 3072. So, you’ll need to update that as well.
Code Signing Certificate Key Generation in OpenSSL
Here’s an example of the OpenSSL command you can use to create your code signing key:
OpenSSL genrsa -out yourprivatekeyname.key 3072
Here’s a more specific example:
OpenSSL genrsa -out code_signing_key.key 3072

Code Signing Certifiate CSR Generation in OpenSSL
To generate the code signing certificate CSR, enter the following:
OpenSSL req -new -key yourprivatekeyname.key -out code_signing_csr.txt
Again, here’s a more specific example using our organizational information:
OpenSSL req -new -key code_signing_key.key -out code_signing_csr.txt

Single Command for Code Signing CSR & Key Generation in OpenSSL
Again, if you want to use a single command to complete steps three and four, you could include all of the required information fields (which we’ll cover in the next section) using a command like the following:
Openssl req -new -newkey rsa:3072 -nodes -out code_signing_csr.txt -keyout code_signing_key.key -subj “/C=US/ST=Florida/L=St.Petersburg/O=Rapid Web Services, LLC/CN=Rapid Web Services, LLC
Step Four: Complete the Required Fields to Add Information to Your CSR
This next part of the process varies depending on which type of certificate you’re getting. You’ll need to provide several essential pieces of domain- and/or company-specific information. Note: You can skip this step if you already added that information using the long OpenSSL command mentioned in step three.
What Information to Enter for an SSL/TLS Certificate
Common Name: This is where you’ll enter the fully qualified domain name (FQDN) you wish to secure (for example, www.codesigningstore.com or *.codesigningstore.com ).
Organization: This is your organization’s legally registered name. For this example, we’d use Rapid Web Services, LLC for ours.
Department: This is also known as the organizational unit or OU field. You can skip this since OU field info will no longer be included in publicly trusted SSL/TLS certificates. (Just hit Enter to skip it.)
City, State/Province, and Country: For each of these separate fields, enter the corresponding legally registered information of your organization.
The Command Prompt will ask you to input an email address, challenge password, and an optional company name. Just skip all three by hitting Enter in response to each prompt.
What Information to Enter for a Code Signing Certificate
The fields mentioned above are largely the same with a few minor differences — for example, you’ll use your organization’s name or your individual personal name (if you’re an independent developer) for the Common Name (CN) field.
Once you’ve completed the key and CSR generation process, you’ll need to move both of these files out of the OpenSSL directory on your machine.
Step Five: Move Your Private Key and CSR to a Central Directory on Your Computer
Don’t keep your certificate or key files in the OpenSSL directory — move them elsewhere to a central location. This part is essentially the same for both types of certificates; just use a different folder name for the directory. Also, don’t share your private key with anyone for any reason!
The public key (which is included in the CSR, the long string of data that starts with the phrase “—–BEGIN NEW CERTIFICATE REQUEST—– “) is what you’re going to share with the issuing certificate authority as part of the certificate enrollment process (more on that later).
How to Relocate Your SSL/TLS Certificate CSR and Private Key
If you’ve created an OpenSSL CSR generation for a code signing certificate, you could relocate the CSR and key files to a folder called Certificates, for example. Do this by using the following three-command set (pressing Enter after each entry):
- md \c:\certificates — This OpenSSL command will create a new directory for you to move your certificate and key to that’s away from the OpenSSL folder.
- move yourprivatekeyname.key c:\certificates — This command will move your private key to the newly created folder.

- move your_csr.txt c:\certificates — This command will move your certificate’s CSR to the newly created folder.

How to Relocate Code Signing Certificate CSR and Private Key
Likewise, you can use OpenSSL commands in the same way to relocate your private key and code signing certificate as well:
- md \c:\codesigningcertificates
- move code_signing_key.key c:\codesigningcertificates

- move code_signing_csr.txt c:\codesigningcertificate

Now, you can use the CSR information in your enrollment process. To access the CSR details, either open the .txt file directly using Notepad or enter the following command in CMD (which basically just opens the file in Notepad for you):
notepad c:\certificate\csr.txt
Using our examples, the code would look like the following:
c:\CodeSigningCertificates\code_signing_csr.txt
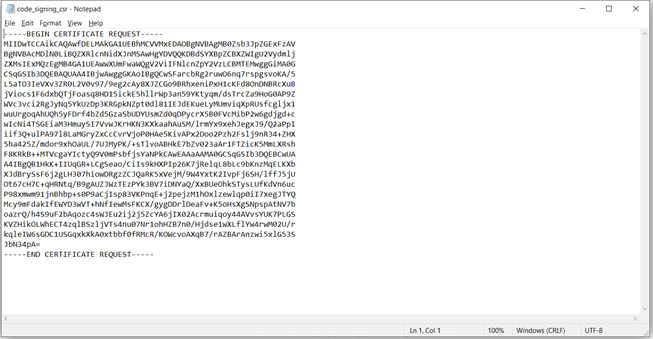
Send Your CSR Info to Your Issuing CA for Validation & to Generate Your Certificate
That’s it! You’re done with the CSR generation process in OpenSSL. The next step is to add the CSR information to your certificate order so the issuing certificate authority (CA) can use it to validate and generate your certificate. Of course, this process varies depending on where you got your certificate and the type of certificate you’ve selected.
If you purchased your certificate through CodeSigningStore.com, you can do this by:
- Signing into your CodeSigningStore.com customer account
- Navigating to the order page and selecting the appropriate certificate
- Selecting the Next Step: Generate Certificate button and completing the certificate generation process

Great! Now, depending on the type of certificate you got and whether your business has already undergone validation with the CA, you’ll either receive your certificate within a few hours or a few days. So, keep an eye out in your email for the certificate to be sent (either as a link or an attachment).


